Scroll Office Exporter - Confluence Page 를 MS-WORD로 변환
Scroll Office 는 Confluence 페이지를 MS Word 로 변환해 주는 플러그인입니다.
Confluence 의 기본 기능과는 달리 템플릿을 적용할 수 있고 child 페이지를 포함시킬 수 있는등 여러 가지 유용한 기능이 있으므로 page 를 외부에 유통시킬 문서로 만들때 적합합니다.
책을 쓸 때 Confluence page + scroll office 를 활용했는데 자세한 내용은 Confluence 로 책 저술 하기 #1 를 참고하세요
설치
market place 에서 scroll office 를 찾아서 설치하면 됩니다.
기본 템플릿 설치
- .obr 파일 다운로드((https://marketplace.atlassian.com/apps/24982/scroll-office-for-confluence/version-history) & 압축해제
- 해제해서 나온 scroll-office-3.0.10.jar 를 압축 해제
- scroll-office-3.0.10\com\k15t\scroll\words\template 폴더로 이동
- 다음 두 파일이 템플릿
사용
export 시 제외할 content 설정
{scroll-ignore} 매크로안에 제외할 content 를 넣어주면 해당 내용은 export 시 빠지게 됩니다.
페이지 전체를 export 에서 제외
scroll-ignore macro 는 페이지 자체를 제외하지는 않고 페이지내 특정 콘텐츠만 제외하게 된다. 특정 페이지를 아예 제외하려면 다음과 같이 하면 됩니다. (Scroll PDF 도 동일)
- 제외할 페이지에 특정한 label 을 적용. (Ex: scroll-exclude )
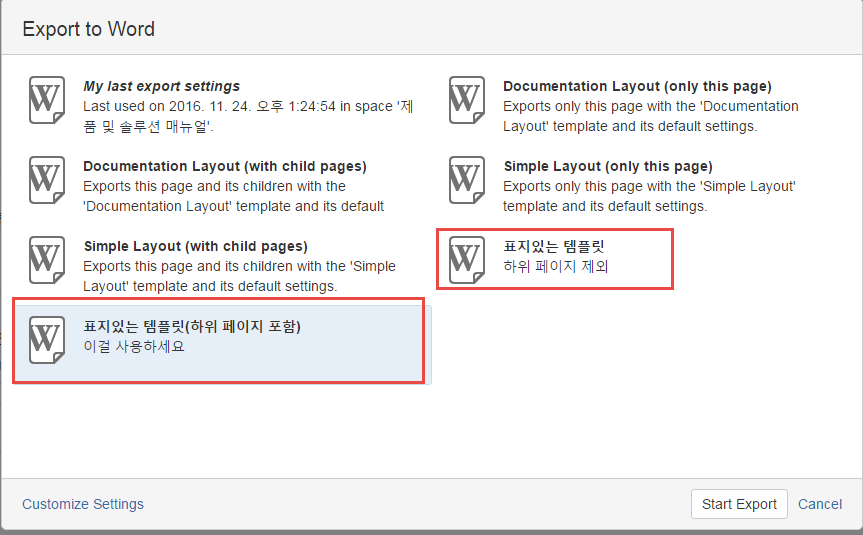
- Tools -> Export to Word 메뉴를 선택하고 export scheme 에서 This page and all children with label ... 를 선택
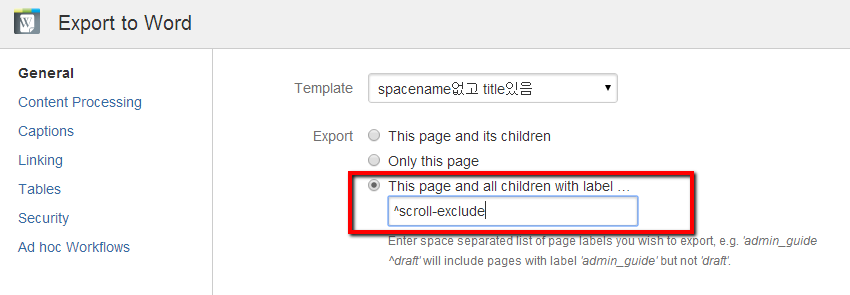
- ^scroll-exclude 를 입력하고 OK 를 클릭
PlaceHolder 참고
기본 템플릿 사용하지 않게 설정
기본 내장된 템플릿을 중지하기
- Confluence Admin console 로 들어감
- Manage Add-ons
- Scroll Office 선택
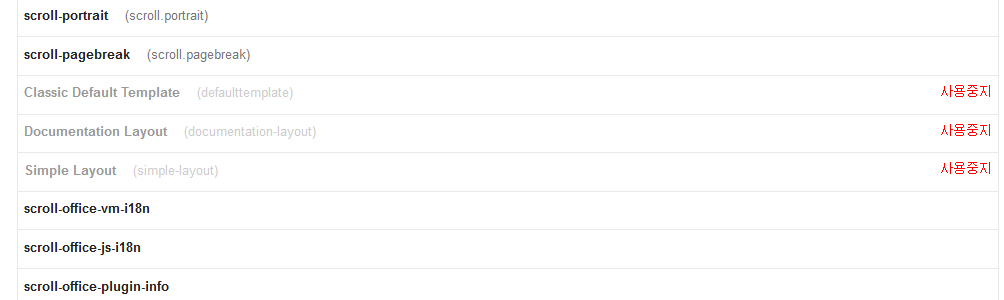
- defaulttemplate, Confluence Default 를 선택하고 Disable 클릭
템플릿 관리
전역 템플릿 등록
- admin→scroll office→templates 메뉴 진입
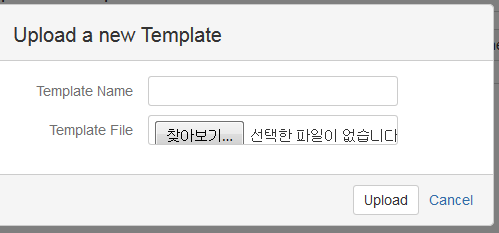
- Add new template 클리r
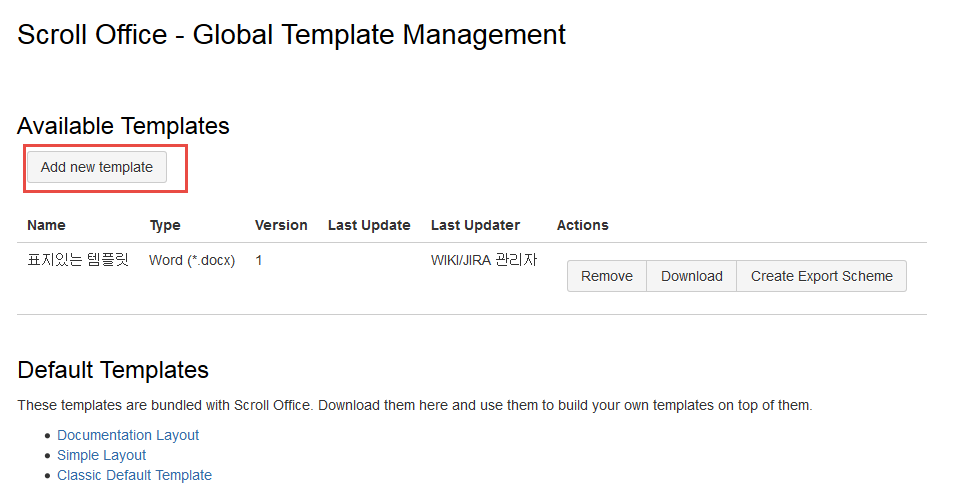
- 템플릿 이름을 입력하고 템플릿으로 사용할 docx 를 업로드
템플릿 변경
- 템플릿을 변경하는 메뉴가 없다고 삭제하고 재등록하지 말것
- Add new template 을 클릭하고 동일한 템플릿 이름을 주면 버전이 올라가고 업데이트 됨.
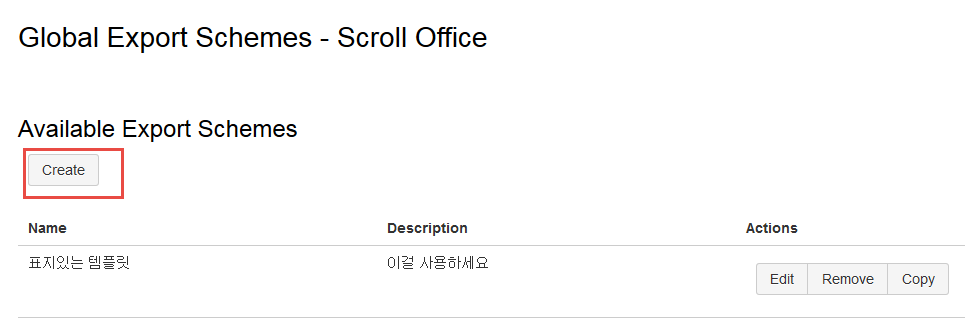
export schemes
위에서 만든 템플릿을 export 메뉴에 표시하려면 export shcemes 에 등록 필요
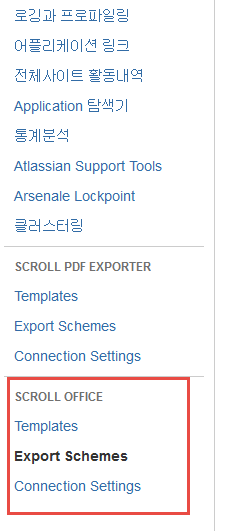
- Scroll Office → Export schemes 메뉴 진입
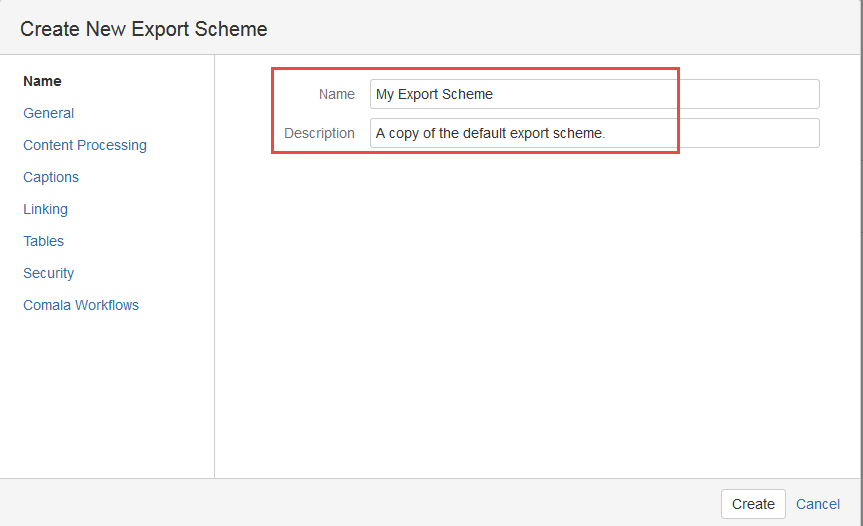
- Create 클릭
- 템플릿 이름과 용도 기술
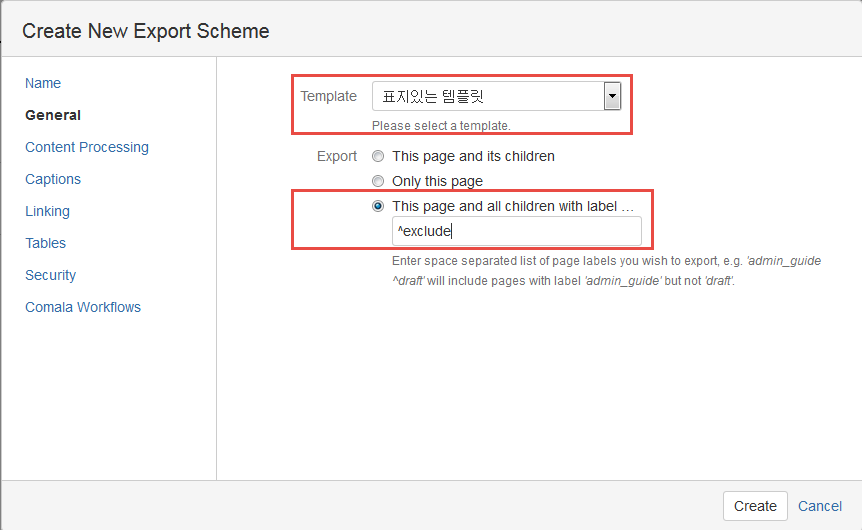
- General 메뉴에서 사용할 템플릿을 설정하고 하위 페이지 포함 여부 설정. ^exclude 는 exclude 라는 label 이 붙은 페이지는 export 에서 제외한다는 의미
- 고해상도 이미지 export 를 위해 아래 체크 박스 체크
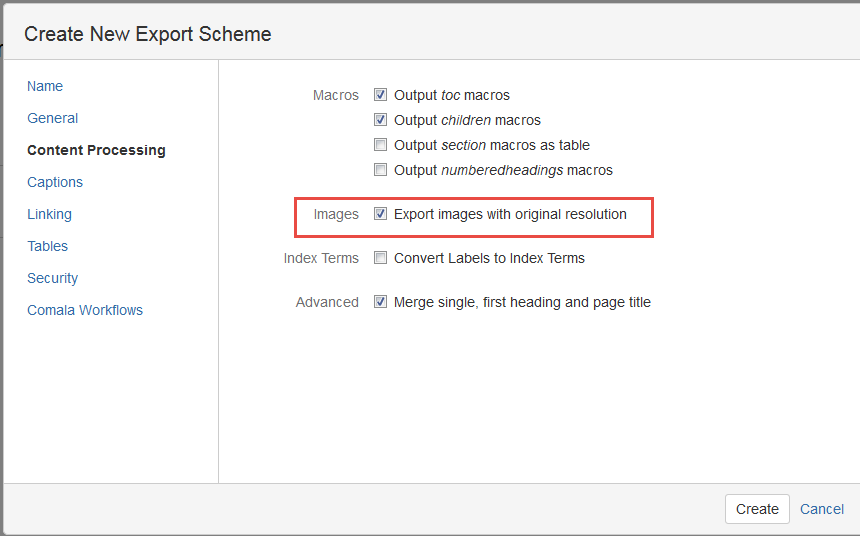
- 기타 설정후 Create 클릭
- Export to Word 메뉴 선택시 등록한 scheme 이 표시되는지 확인.
템플릿 만들기
Creating the Table of Figures
http://www.k15t.com/display/OFCE/Creating+the+Table+of+Figures
제작사에서 제공한 템플릿은 표나 그림이 영어로 되어 있다.
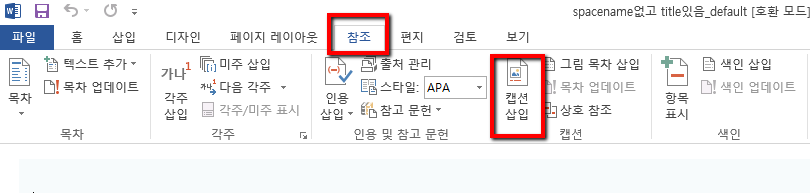
- 템플릿 워드 파일을 연다
- 참조 탭을 열고 캡션 삽입 을 클릭한다.
- 새 레이블을 선택하고 레이블명에 표 를 입력한다.
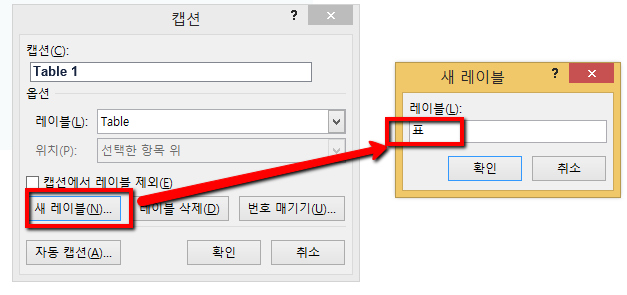
- 새 레이블을 선택하고 레이블명에 그림 을 입력한다
- 새로 추가한 레이블을 선택하고 번호 매기기 를 클릭한다.
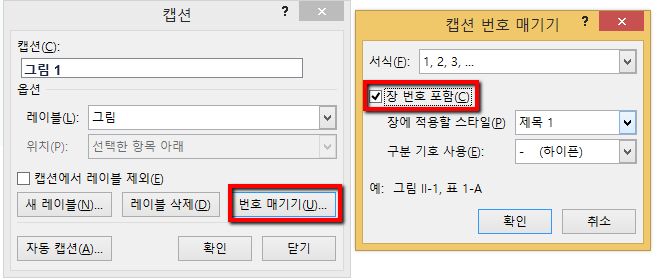
- 장 번호 포함을 누른다.
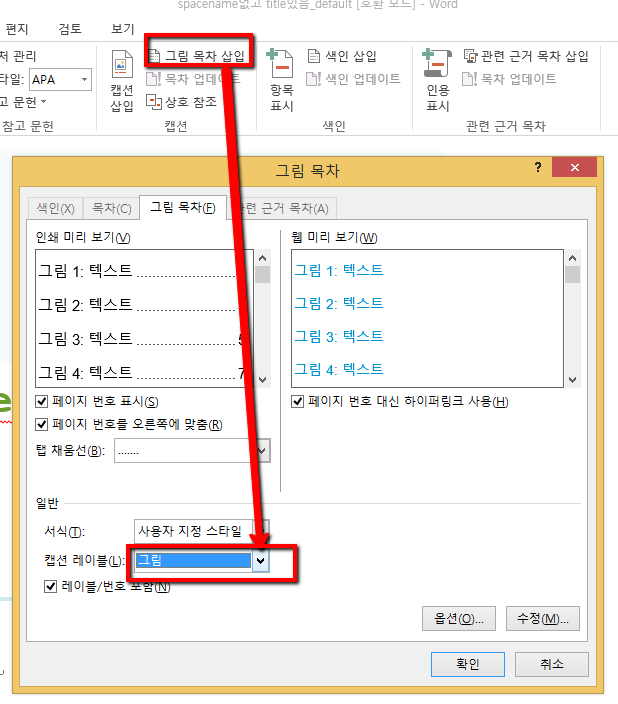
- 그림 목차 삽입을 누르고 캡션 레이블에 방금 만든 레이블을 선택한다.
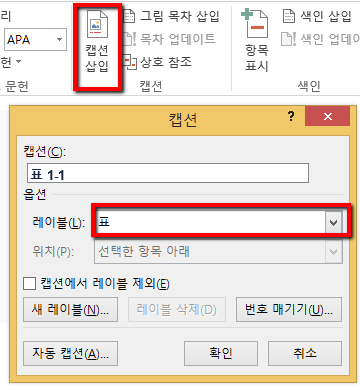
- 캡션 삽입을 누르고 하단의 레이블에 방금 만든 레이블을 설정한다.
- 확인을 누르고 템플릿 파일을 저장한 다음에 scroll office 템플릿으로 업로드한다
Defining the Caption Styles
현재 다음 이슈때문에 캡션 스타일 적용은 동작하지 않음(https://k15t.jira.com/browse/EXP-450)
http://www.k15t.com/display/OFCE/Defining+the+Caption+Styles
- Click the Insert tab and click Picture.
The screen Insert Picture is displayed. - Choose any picture and click Insert.
The picture is inserted in your template. - Right-click on the picture and click Insert Captions.
The screen Caption is displayed. - Select the label in the Label drop-down.
 You can define your own labels by clicking on New Label.
 - Select the position of your label in the Position drop-down.
- Click OK.
The caption is inserted. - Click the Dialog Box Launcher in the lower right corner of Change Styles.
- Right-click on Caption and click Modify.
The screen Modify Style is displayed. - You can now change the font, fontsize, color and other properties. For more information, see Microsoft Office Help.
- Click OK to save your changes.
The caption is displayed in the assigned style. - Click the Insert tab and click Table.
- Select a 2x2-Table.
A table with two columns and two rows is inserted. - Mark the table, right-click it and click Insert Captions.
- Repeat steps four to six for the table caption.
- Delete the (temporary) table and picture including the caption and save your template.
PlaceHolder 사용
scroll 기본 스타일 변경
- 워드에서 Ctrl-Alt-Shit-S 눌러서 스타일 창 호출
- 하단의 Manage Style 클릭
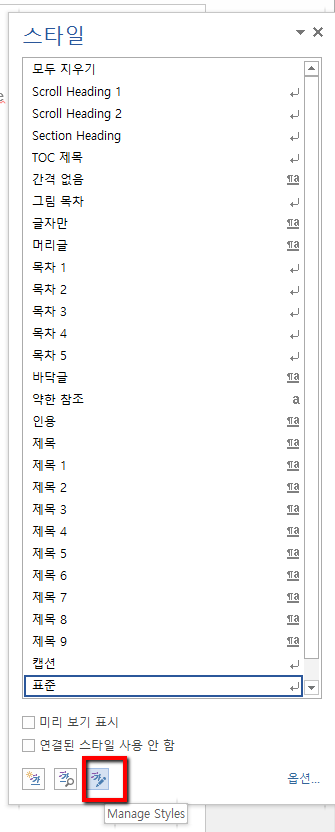
- 스타일 목록에서 Scroll 로 시작하는 스타일이 scroll office 의 기본 스타일
- 수정할 스타일을 선택하고 수정을 눌러서 스타일 수정
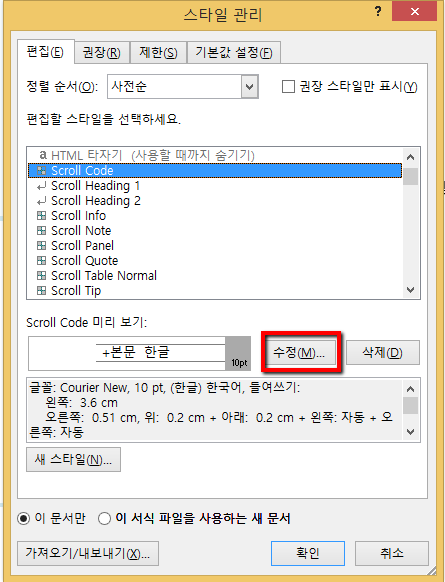
- 저장후에 Scroll Office Template 으로 업로드